
Planning & DIY
The Right Order to Finish a Basement, Step by Step
By Bo Fric · July 1, 2025
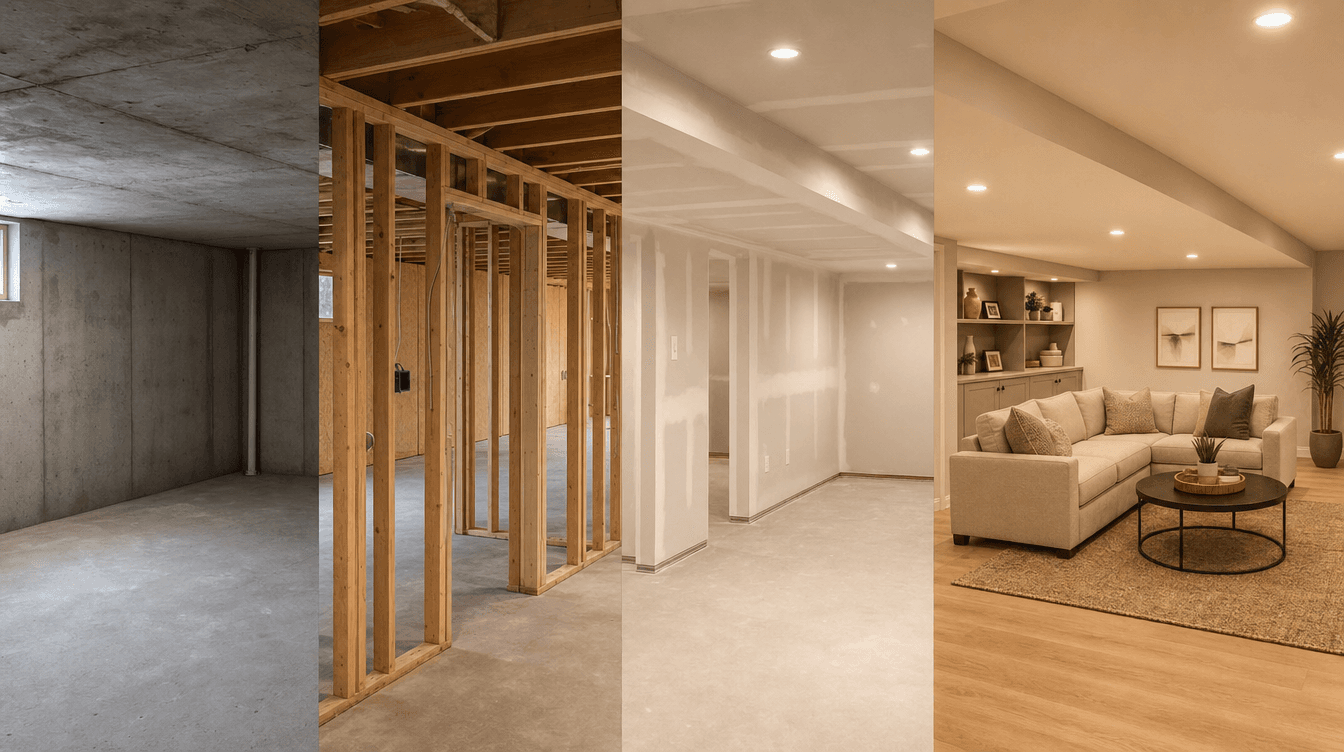
The right order to finish a basement, step by step — the construction sequence from moisture and framing to final finishes, and why doing it in order matters.
A basement is finished in a specific construction sequence, and the order isn't arbitrary — each stage has to be done before the next can begin. The rough sequence is: handle moisture and prep → rough-in (framing, electrical, plumbing) → rough-in inspection → insulation and drywall → finishes → fixtures → final inspection. Understanding it helps whether you're doing it yourself or just following your project. Here's the step-by-step. (This is the general sequence; the specifics are tailored to your basement.)
Step 1: Moisture and prep
Before anything, the space has to be dry and ready. Any moisture issue is resolved first — you never build over a water problem, or you trap it behind the walls. This is also when the basement is assessed for readiness.
Step 2: Rough-in (the bones)
Next, the skeleton goes in:
- Framing the walls (and any egress window work).
- Electrical rough-in through the open studs.
- Plumbing rough-in for any bathroom or bar.
- HVAC changes for heating and ventilation.
Everything that lives inside the walls happens now, while they're open.
Step 3: Rough-in inspection
Before anything is covered, the rough-in is [inspected](/blog/basement-inspection-process) — framing, electrical, and plumbing verified while they're still visible. This staging is deliberate: once drywall goes up, none of it can be seen again.
Step 4: Insulation and drywall
With inspection passed, the walls close up:
- [Insulation](/blog/insulate-basement-walls) installed correctly for a below-grade wall.
- Drywall hung, taped, and finished on walls and ceiling.
Step 5: Finishes
Now the visible work, in a logical order so nothing damages what came before — generally flooring, then paint, then trim and doors. The finish tier you chose shows up here.
Step 6: Fixtures and final touches
Then the things that make it usable: lighting, plumbing fixtures, cabinets, countertops, and hardware — the final layer installed on top of the finished surfaces.
Step 7: Final inspection and walkthrough
Finally, the final inspection confirms the completed space meets code, and the walkthrough hands it over. That's the finish line.
Why the order matters
Each step supports the next — you can't drywall before inspection, can't inspect before rough-in, can't rough-in over a moisture problem. Doing it in order is how a build stays efficient and correct; doing it out of order means redoing work. Sequencing the whole thing properly is exactly what a builder plans before breaking ground, and it's the backbone of our process.
What order do you finish a basement in?
Roughly: resolve moisture and prep the space, rough-in the framing/electrical/plumbing/HVAC, pass a rough-in inspection, insulate and drywall, install finishes (flooring, then paint, then trim and doors), add fixtures and final touches, then the final inspection and walkthrough. Each step has to happen before the next can.
What comes first when finishing a basement?
Handling moisture and prepping the space. You never build over a water problem, so any dampness or drainage issue is resolved before framing begins — otherwise you trap the moisture behind the finished walls and cause mold and damage. After the space is confirmed dry and ready, framing and the rough-in trades follow.
Why does the order of finishing a basement matter?
Because each stage depends on the one before it — you can't drywall before the rough-in is inspected, can't inspect before the framing and wiring are in, and can't build over unresolved moisture. Following the correct sequence keeps the build efficient and code-compliant; going out of order usually means tearing out and redoing work.